Welcome to a More Powerful WP-Admin Experience
As Automattic CEO Matt Mullenweg teased in a January blog post, our team at WordPress.com is working hard to enhance our developer experience. Improving what you see in your dashboard when you log into WordPress.com is one of our biggest goals.
Today, we’re excited to unveil a more powerful wp-admin experience (if you know, you know), which will soon be available to all sites on Creator and Entrepreneur plans. Read on to find out how to get early access.
Don’t call it a comeback
For many years, the default view for WordPress.com users has been a modernized, more friendly version of the classic WordPress experience. Around the office, we call this interface “Calypso.” It offers sleek post/page management, easy profile edits, built-in tips and resources for starting or growing your site, and more.
While the Calypso interface is ideal for some folks, we’ve heard from a lot of developers that you’d prefer easy access to the classic WordPress dashboard experience. So, we’re doing just that by making it possible for wp-admin to be the default view when you log in.

Our mission here is to empower our power users—those on Creator and Entrepreneur plans—to leverage WordPress to its fullest. This update promises:
- Enhanced flexibility: Tailor your interface to seamlessly match your workflow.
- A familiar, WordPress-centric experience: Enjoy an interface that feels right at home, mirroring the robust capabilities you expect from other WordPress hosts.
- Superior management for complex sites: Handle sophisticated sites and client projects with ease.
While this initial launch is for Creator and Entrepreneur subscribers, our commitment extends to all WordPress.com users. We’re excited about the possibility of expanding these features to everyone in the future.
Join the early access list
To access the wp-admin interface you know and love, please join our email list below to be considered for early access.
And stay tuned for even more updates coming your way, including a few menu and navigation changes that you won’t want to miss.
Read more https://wordpress.com/blog/2024/03/04/wp-admin/
- Details
- Category: Dev News
VS Code Extension for API Insights
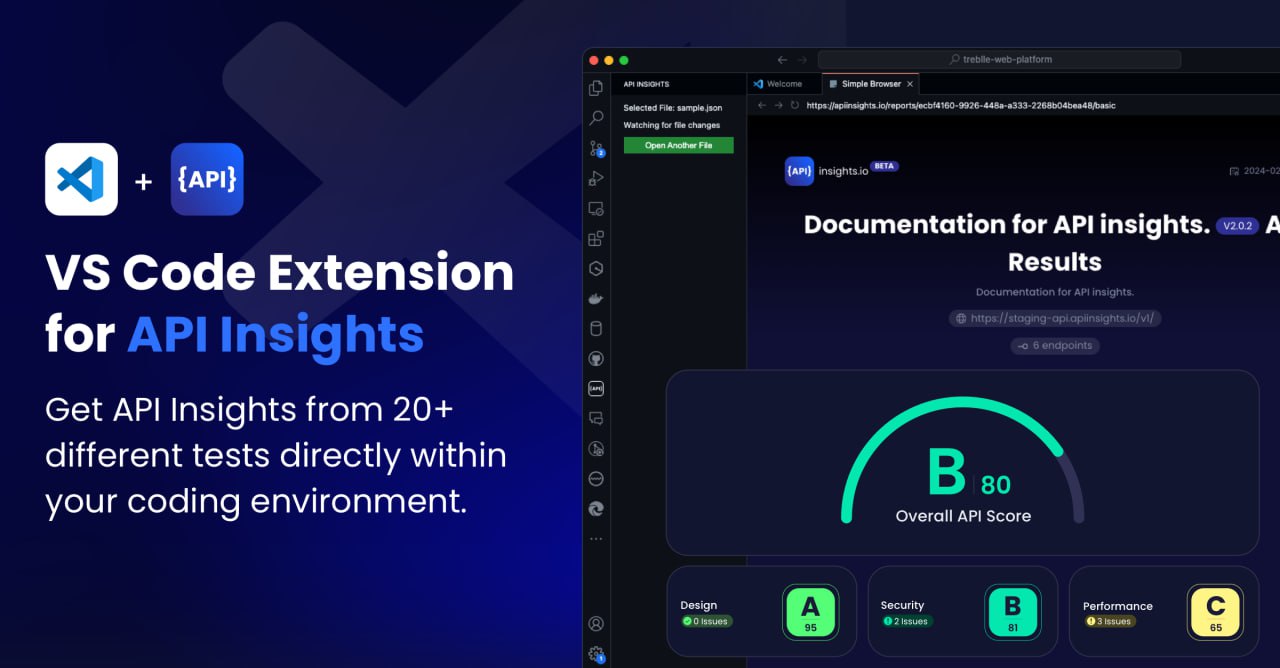
Recently, at Treblle, we released a Visual Studio Code extension to work with our free developer tool, API Insights. After releasing this new tool, we wanted to look for ways developers building OpenAPI Specifications could benefit without stopping what they were doing.
So, for those who need to be made aware, API Insights is a free developer tool we created at Treblle that lets you get insights into your API design. It will score your OpenAPI Specification against:
- Performance
- Quality
- Security
The way this works is that we analyze your specification to understand what this API does. We then compare your API to a set of industry standards for APIs and see how close you are to having an "industry standard API".
However, we go a step further than just analyzing your specification; we send a request to the first endpoint that could be successful and measure load time and response size. We can analyze something similar to understand your API better.
The VS Code extension will allow you to analyze your specifications without leaving your editor. Even better, though, is that it will then watch this file for changes and prompt you to re-run the analysis if a change is detected.
We wrote about this new free tool in a little more detail on our blog and would love to hear your thoughts about the extension - also, what developer tool you would find helpful! You never know; we may build it.
The post VS Code Extension for API Insights appeared first on Laravel News.
Join the Laravel Newsletter to get all the latest Laravel articles like this directly in your inbox.
Read more https://laravel-news.com/vs-code-extension-for-api-insights
- Details
- Category: Dev News
Phone Number Formatting, Validation, and Model Casts in Laravel

The Laravel-Phone package makes working with phone numbers in PHP and Laravel a breeze, offering validation rules, attribute casting, utility helpers, and more.
Have you ever built validation around phone numbers that supports multiple countries? This package has helpful validation rules built in, which makes it easy to validate numbers for any country. You can specify acceptible country code formats, but at the same time accept valid "international" numbers:
// Validate either USA or Belguim
Validator::make($request->all(), [
    'phone_number' => 'phone:US,BE',
]);

// Validate US specifically, but also accept other countries
Validator::make($request->all(), [
    'phone_number' => 'phone:US,INTERNATIONAL',
]);

// Use the Phone rule
Validator::make($request->all(), [
    'phone_number' => (new Phone)->country(['US', 'BE']),
]);

// Match country code against another data field
Validator::make($request->all(), [
    'phone_number' => (new Phone)->countryField('custom_country_field'),
    'custom_country_field' => 'required_with:phone_number',
]);
This package uses the PHP port of Google's phone number handling library under the hood, which has robust parsing, formatting, and validation capabilities for working with phone numbers in PHP:
// Formatting examples

$phone = new PhoneNumber('012/34.56.78', 'BE');

$phone->format($format);       // Custom formatting
$phone->formatE164();          // +3212345678
$phone->formatInternational(); // +32 12 34 56 78
$phone->formatRFC3966();       // +32-12-34-56-78
$phone->formatNational();      // 012 34 56 78
You can learn more about this package, get full installation instructions, and view the source code on GitHub. I recommend getting started with the readme for full documentation about this package.
The post Phone Number Formatting, Validation, and Model Casts in Laravel appeared first on Laravel News.
Join the Laravel Newsletter to get all the latest Laravel articles like this directly in your inbox.
Read more https://laravel-news.com/laravel-phone
- Details
- Category: Dev News
Add Architecture Tests to Saloon API Integrations with Lawman
Lawman is a Pest PHP plugin that makes adding arch tests to your application for your API integrations easy, with a set of Saloon Expectations!
<script async src="https://platform.twitter.com/widgets.js" charset="utf-8"></script>This weekend I worked on something new and shiny for SaloonPHP. I'd like to introduce you to Lawman.
— Jon Purvis (@JonPurvis_) February 14, 2024
Lawman is a @pestphp plugin that makes adding arch tests to your application for your API integrations easy, with a set of Saloon Expectations!https://t.co/WUIGnHriNo
✨🤠
It is already possible to write architecture tests for Saloon with PestPHP, but Lawman aims to make it quicker to write and easier to read. Take this example of a connector arch test with and without Lawman:
// Without Lawman
test('connector')
    ->expect('App\Http\Integrations\Integration\Connector')
    ->toExtend('Saloon\Http\Connector')
    ->toUse('Saloon\Traits\Plugins\AcceptsJson')
    ->toUse('Saloon\Traits\Plugins\AlwaysThrowOnErrors');

// With Lawman
test('connector')
    ->expect('App\Http\Integrations\Integration\Connector')
    ->toBeSaloonConnector()
    ->toUseAcceptsJsonTrait()
    ->toUseAlwaysThrowOnErrorsTrait();
You can see examples and a complete list of expectations available in Lawman by checking out the plugin documentation page in the Saloon docs.
The post Add Architecture Tests to Saloon API Integrations with Lawman appeared first on Laravel News.
Join the Laravel Newsletter to get all the latest Laravel articles like this directly in your inbox.
Read more https://laravel-news.com/lawman-saloon-arch-tests
- Details
- Category: Dev News
How We Built a New Home for WordPress.com Developers Using the Twenty Twenty-Four Theme
In the last few weeks, our team here at WordPress.com has rebuilt developer.wordpress.com from the ground up. If you build or design websites for other people, in any capacity, bookmark this site. It’s your new home for docs, resources, the latest news about developer features, and more.
Rather than creating a unique, custom theme, we went all-in on using Twenty Twenty-Four, which is the default theme for all WordPress sites.
That’s right, with a combination of built-in Site Editor functionalities and traditional PHP templates, we were able to create a site from scratch to house all of our developer resources.
Below, I outline exactly how our team did it.
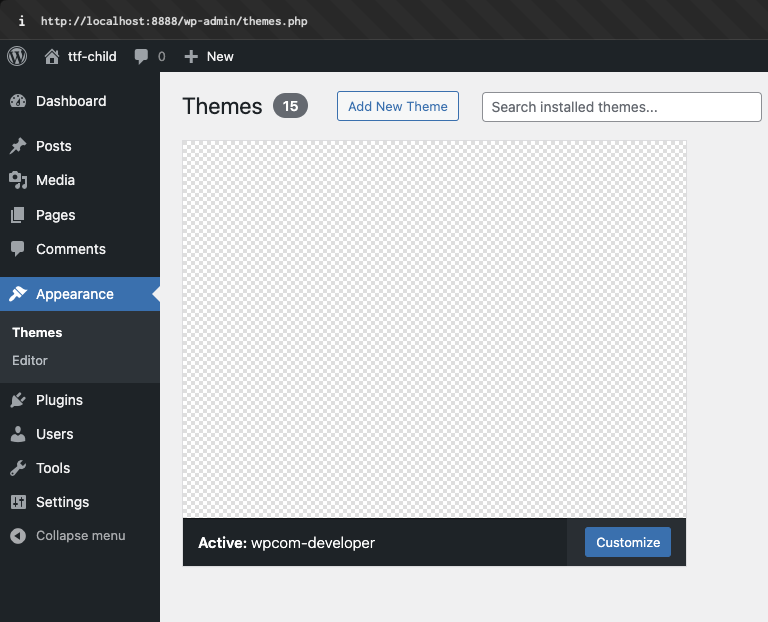
A Twenty Twenty-Four Child Theme
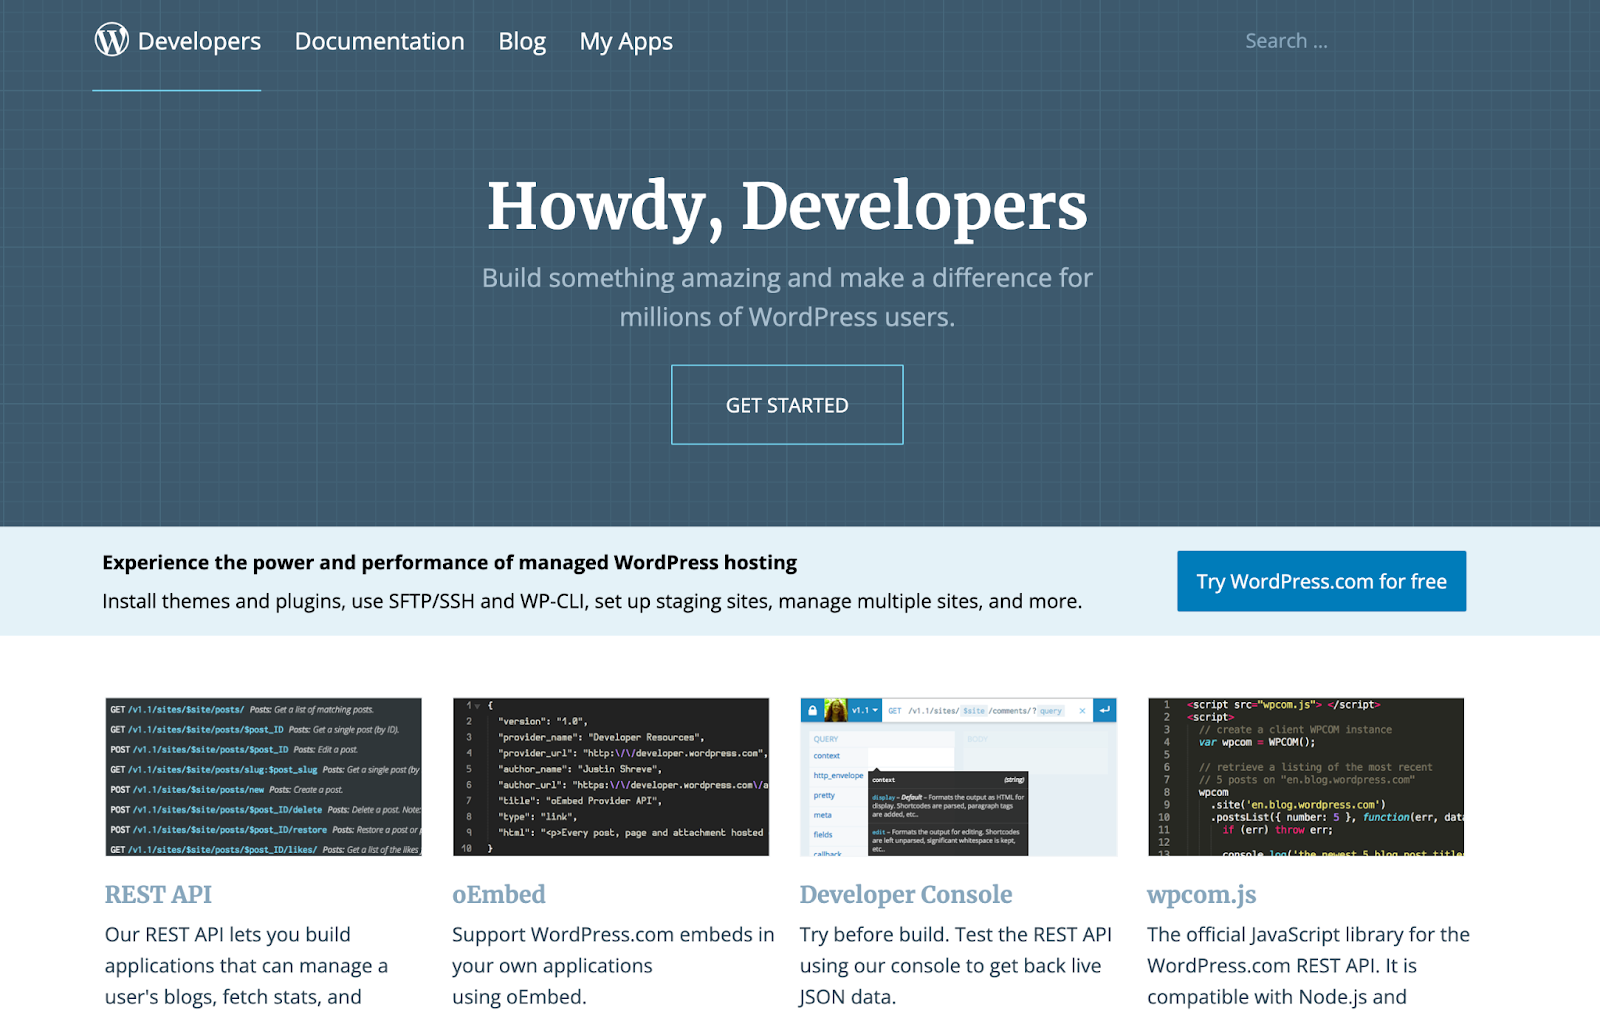
The developer.wordpress.com site has existed for years, but we realized that it needed an overhaul in order to modernize the look and feel of the site with our current branding, as well as accommodate our new developer documentation.
You’ll probably agree that the site needed a refresh; here’s what developer.wordpress.com looked like two weeks ago:
Once we decided to redesign and rebuild the site, we had two options: 1) build it entirely from scratch or 2) use an existing theme.
We knew we wanted to use Full Site Editing (FSE) because it would allow us to easily use existing patterns and give our content team the best writing and editing experience without them having to commit code.
We considered starting from scratch and using the official “Create Block Theme” plugin. Building a new theme from scratch is a great option if you need something tailored to your specific needs, but Twenty Twenty-Four was already close to what we wanted, and it would give us a headstart because we can inherit most styles, templates, and code from the parent theme.
We quickly decided on a hybrid theme approach: we would use FSE as much as possible but still fall back to CSS and classic PHP templates where needed (like for our Docs custom post type).
With this in mind, we created a minimal child theme based on Twenty Twenty-Four.
Spin up a scaffold with
@wordpress/create-block
We initialized our new theme by running npx
@wordpress/create-block@latest wpcom-developer.
This gave us a folder with example code, build scripts, and a plugin that would load a custom block.
If you only need a custom block (not a theme), you’re all set.
But we’re building a theme here! Let’s work on that next.
Modify the setup into a child theme
First, we deleted wpcom-developer.php, the
file responsible for loading our block via a plugin. We also added
a functions.php file and a style.css
file with the expected syntax required to identify
this as a child theme.
Despite being a CSS file, we’re not adding any styles to the
style.css file. Instead, you can think of it
like a documentation file where Template:
twentytwentyfour specifies that the new theme we’re creating
is a child theme of Twenty Twenty-Four.
/*
Theme Name: wpcom-developer
Theme URI: https://developer.wordpress.com
Description: Twenty Twenty-Four Child theme for Developer.WordPress.com
Author: Automattic
Author URI: https://automattic.com
Template:
twentytwentyfour
Version: 1.0.0
*/
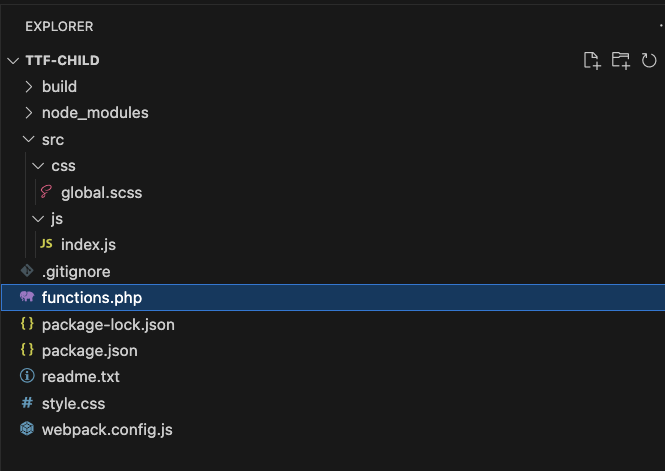
We removed all of the demo files in the “src” folder and added two folders inside: one for CSS and one for JS, each containing an empty file that will be the entry point for building our code.
The theme folder structure now looked like this:
The build scripts in @wordpress/create-block can
build SCSS/CSS and TS/JS out of the box. It uses Webpack behind the
scenes and provides a standard configuration. We can extend the
default configuration further with custom entry points and plugins
by adding our own webpack.config.js file.
By doing this, we can:
- Build specific output files for certain sections of the
site. In our case, we have both PHP templates and FSE
templates from both custom code and our parent Twenty Twenty-Four
theme. The FSE templates need minimal (if any) custom styling
(thanks to
theme.json), but our developer documentation area of the site uses a custom post type and page templates that require CSS. - Remove empty JS files after building the
*.asset.phpfiles. Without this, an empty JS file will be generated for each CSS file.
Since the build process in WordPress Scripts relies on Webpack, we have complete control over how we want to modify or extend the build process.
Next, we installed the required packages:
npm install path webpack-remove-empty-scripts --save-dev
Our webpack.config.js ended up looking similar to
the code below. Notice that we’re simply extending the
defaultConfig with a few extra properties.
Any additional entry points, in our case src/docs,
can be added as a separate entry in the entry
object.
// WordPress webpack config.
const defaultConfig = require( '@wordpress/scripts/config/webpack.config' );

// Plugins.
const RemoveEmptyScriptsPlugin = require( 'webpack-remove-empty-scripts' );

// Utilities.
const path = require( 'path' );

// Add any new entry points by extending the webpack config.
module.exports = {
        ...defaultConfig,
        ...{
                entry: {
                        'css/global':  path.resolve( process.cwd(), 'src/css',   'global.scss' ),
                        'js/index': path.resolve( process.cwd(), 'src/js', 'index.js' ),
                },
                plugins: [
                        // Include WP's plugin config.
                        ...defaultConfig.plugins,
                        // Removes the empty `.js` files generated by webpack but
                        // sets it after WP has generated its `*.asset.php` file.
                        new RemoveEmptyScriptsPlugin( {
                                stage: RemoveEmptyScriptsPlugin.STAGE_AFTER_PROCESS_PLUGINS
                        } )
                ]
        }
};
In functions.php, we enqueue our built assets and
files depending on specific conditions. For example, we built
separate CSS files for the
docs area of the site, and we only enqueued those CSS files for
our docs.
<?php

function wpcom_developer_enqueue_styles() : void {
    wp_enqueue_style( 'wpcom-developer-style',
        get_stylesheet_directory_uri() . '/build/css/global.css'
    );
}

add_action( 'wp_enqueue_scripts', 'wpcom_developer_enqueue_styles' );
We didn’t need to register the style files from Twenty Twenty-Four, as WordPress handles these inline.
We did need to enqueue the styles for our classic, non-FSE templates (in the case of our developer docs) or any additional styles we wanted to add on top of the FSE styles.
To build the production JS and CSS locally, we run npm run
build.
For local development, you can run npm run start in
one terminal window and npx wp-env start (using the wp-env package) in another to start a
local WordPress development server running your theme.
While building this site, our team of designers, developers, and content writers used a WordPress.com staging site so that changes did not affect the existing developer.wordpress.com site until we were ready to launch this new theme.
theme.json
Twenty Twenty-Four has a comprehensive theme.json
file that defines its styles. By default, our hybrid theme inherits
all of the style definitions from the parent (Twenty Twenty-Four)
theme.json file.
We selectively overwrote the parts we wanted to change (the color palette, fonts, and other brand elements), leaving the rest to be loaded from the parent theme.
WordPress handles this merging, as well as any changes you make in the editor.
Many of the default styles worked well for us, and we ended up
with a compact theme.json file that defines colors,
fonts, and gradients. Having a copy of the parent theme’s
theme.json file makes it easier to see how colors are
referenced.
You can change theme.json in your favorite code
editor, or you can change it directly in the WordPress editor and
then download the theme files from
Gutenberg.
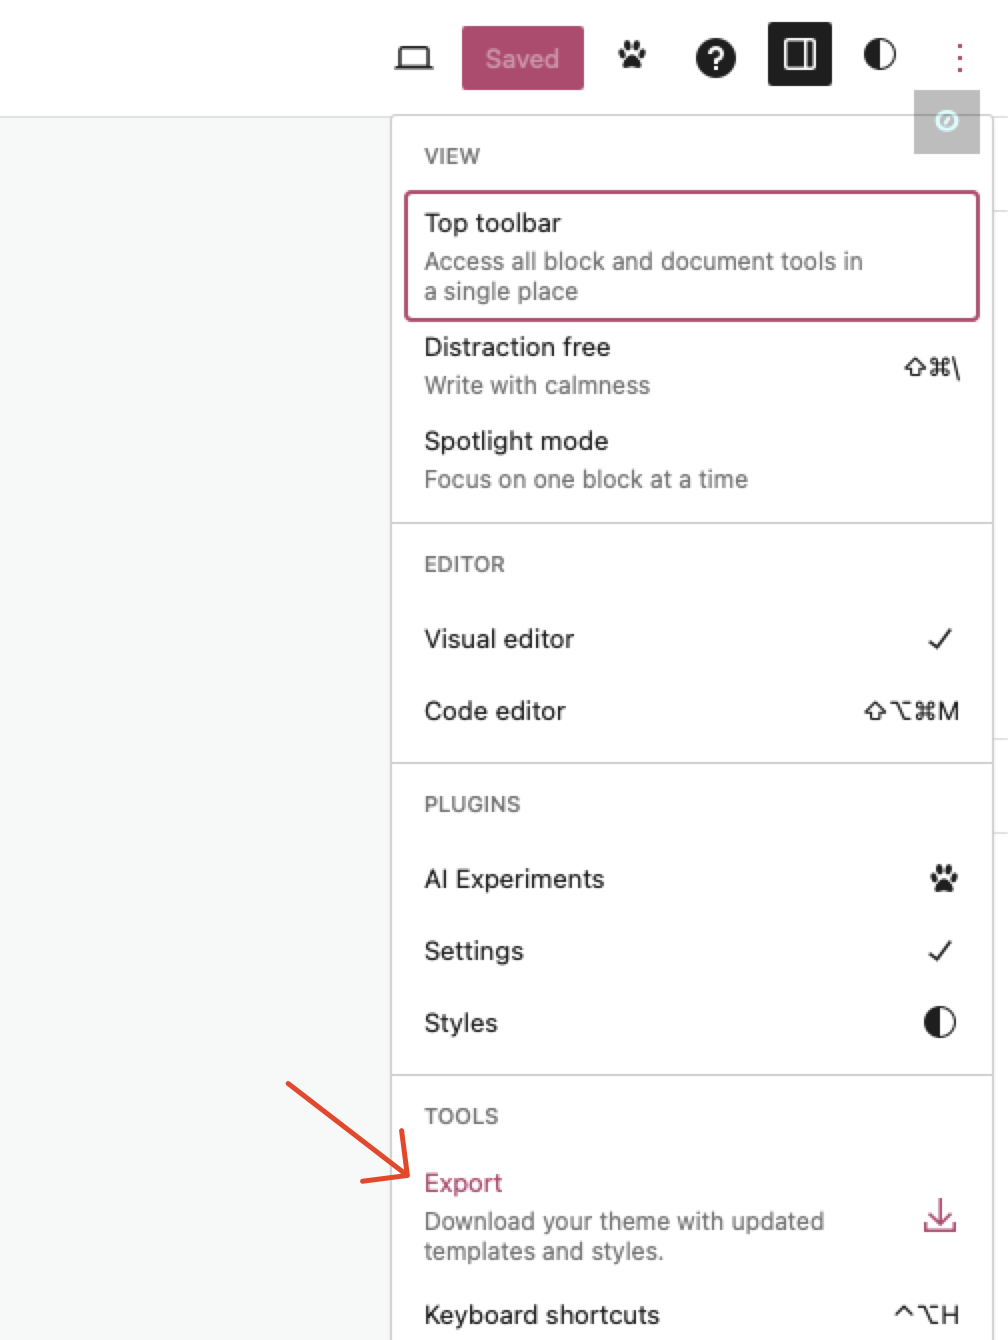
Why might you want to export your editor changes? Styles can then be transferred back to code to ensure they match and make it easier to distribute your theme or move it from a local development site to a live site. This ensures the FSE page templates are kept in code with version control.
When we launched this new theme on production, the template files loaded from our theme directory; we didn’t need to import database records containing the template syntax or global styles.
Global styles in SCSS/CSS
Global styles are added as CSS variables, and they can be
referenced in CSS. Changing the value in theme.json
will also ensure that the other colors are updated.
For example, here’s how we reference our “contrast” color as a border color:
border-color: var(--wp--preset--color--contrast);
What about header.php and
footer.php?
Some plugins require these files in a theme, e.g. by calling
get_header(), which does not automatically load the
FSE header template.
We did not want to recreate our header and footer to cover those cases; having just one source of truth is a lot better.
By using do_blocks(), we were able to render our
needed header block. Here’s an example from a header template
file:
<head>
<?php
wp_head();
$fse_header_block = do_blocks( '<!-- wp:template-part {"slug":"header","theme":"a8c/wpcom-developer","tagName":"header","area":"header", "className":"header-legacy"} /-->' );
?>
</head>
<body <?php body_class(); ?>>
<?php
echo $fse_header_block;
The new developer.wordpress.com site is now live!

Check out our new-and-improved developer.wordpress.com site today, and leave a comment below telling us what you think. We’d love your feedback.
Using custom code and staging sites are just two of the many developer features available to WordPress.com sites that we used to build our new and improved developer.wordpress.com.
If you’re a developer and interested in getting early access to other development-related features, click here to enable our “I am a developer” setting on your WordPress.com account.

Read more https://wordpress.com/blog/2024/02/29/new-developer-home/
- Details
- Category: Dev News
- Protect Routes with JWT Tokens Using This Package for Laravel
- Increment a Rate Limiter by a Custom Amount in Laravel 10.46
- More Control Over the Content You Share
- My Condolences, You’re Now Running a Billion-Dollar Business
- Add Kanban Boards to Your Laravel App in Seconds
- October CMS v3.6 Ships Today, Full of New Features
- Laracon EU Videos are now out
Page 17 of 1310