- Details
- Category: Developer News
Bootstrap v5.3.1 is here with bug fixes, documentation improvements, and more follow-up enhancements for color modes. Keep reading for the highlights!
- Color modes:
$gray-500 with $gray-300 for the body
color Added our color mode switcher JavaScript to our examples ZIP
download
- Components:
.nav-links,
providing .disabled and :disabled for use
with anchors and buttons Add support for Home and
End keys for navigating tabs by keyboard Added some
basic styling to toggle buttons when no modifier class is present
Fixed carousel colors in dark mode
- Forms:
- Utilities:
.text-bg-* utilities now use CSS variables
- Sass:
$navbar-dark-icon-color Sass variable Removed
duplicate $alert Sass variables Added a new variable
for $vr-border-width to customize the vertical rule
helper width
- Documentation:
Get the release
Head to https://getbootstrap.com for the latest. It’s also been pushed to npm:
npm i bootstrap@v5.3.1
Read the GitHub v5.3.1 changelog for a complete list of changes in this release.
Support the team
Visit our Open Collective page or our team members’ GitHub profiles to help support the maintainers contributing to Bootstrap.
Read more https://blog.getbootstrap.com/2023/07/26/bootstrap-5-3-1/
- Details
- Category: Developer News
Hot on the heels of Ionic 7.1 is another great feature release! This release brings updates to Button, Searchbar, and our Angular integration.
Here’s what’s new 
Button Wrapping
We made some important infrastructure improvements to Button ahead of a change we plan to make in Ionic 8. Buttons with long text currently get cut off, making the text impossible to read. Starting in Ionic 8, long text in Buttons will wrap to the next line instead of getting cut off to improve readability.
Why is button text going to wrap instead of truncate with ellipsis?
We collaborated with Todd Libby, a W3C Invited Expert on Accessibility, to develop a solution for this problem. During development, it was noted that truncating text with ellipsis is not an acceptable solution because the text that is truncated is still not readable even though the button layout may look nicer than it did before. Instead, wrapping the text to the next line fixes the original layout issue while ensuring that the text is readable.
Why is this behavior not enabled by default?
During development we identified some instances where this new behavior may cause unexpected layout changes in developer applications. In particular, buttons inside of list headers may wrap instead of displaying on the same line even if the text was never cut off. As a result, we have decided to enable this behavior in Ionic 8.0, so developers can make any necessary changes at their own pace.
How do I opt-in to this behavior now?
Ionic 7.2 lays the groundwork for this change with some internal
fixes to Button. Developers can enable this wrapping behavior now
by setting either the ion-text-wrap class on
ion-button or white-space: normal in
their CSS.
Using a Class
<ion-button class="ion-text-wrap">Some text with a really long label</ion-button>Using CSS
ion-button {
  white-space: normal;
}
We have also launched a new accessibility guide on the Button documentation that shows how to opt-in to this behavior: https://ionicframework.com/docs/api/button#accessibility
Searchbar Name Property
Searchbar now has a “name” property to help identify search data when submitting a form.
<ion-searchbar placeholder="Search for an Artist" name="artist-search"></ion-searchbar>Thanks to NicoDos for contributing this feature!
Angular Route Parameter Binding
Angular 16 introduced a new feature that lets developers bind
route parameters as component inputs. This means that developers
can access the parameter for /my-route/:id by using
the @Input decorator in the associated component.
Ionic 7.2 adds support for this feature to our Router Outlet component. Developers can use this feature by updating their router configuration.
Opt-in with NgModules
RouterModule.forRoot(routes, {
  //... other features
  bindToComponentInputs: true
});
Opt-in with Standalone Components
provideRouter(appRoutes, withComponentInputBinding());Thanks again to everyone who helped make this latest release possible. We’ll catch you soon for the next one!
The post Announcing Ionic 7.2 appeared first on Ionic Blog.
Read more https://ionic.io/blog/announcing-ionic-7-2
- Details
- Category: Developer News
Summer is typically a time to wind down and relax, but our product teams have been BUSY. They’ve been cooking up some fresh updates, and the latest Ionic Show walked through them all.
Couldn’t make the show live? You can watch the full recording here, and read on for a handy recap. Here’s what you may have missed:
The current (and future) state of mobile app development
The show kicked off with Mike and Max talking about the state of the Ionic community. This year, Ionic turned 10 (I know, we look great for our age), and at 1:25 Max reflects on the history of the company. We’re beyond proud of the thriving community we’ve built, and we’re excited to host our first ever in-person ioniconf later this year to celebrate that.
At the 8:55 mark, Max takes us through some trends in the mobile space. Major trends to look for:
- Modernization – complex apps using legacy tech stacks can fall behind, but micro frontends with Ionic Portals can help modernize apps without needing to rebuild them
- Consolidation – lots of large organizations use multiple apps, and consolidating apps into a single ‘superapp’ makes it more efficient for dev teams to maintain while also keeping users from hopping between apps
- PWA’s – 2023 is the year of the Progressive Web App, with PWA’s being critical to app modernization efforts
- AI – what’s hype and what’s real? Where can AI actually add value for developers?
Then the team got into the finer points of smoked meats – is it even worth making ribs without them? At 19:33, Max weighs in.
Framework Updates
At 20:57, Framework Team Lead Liam (AKA Hair Force One) joined Mike to chat about all of the exciting updates that Framework has seen recently.
Long-requested Input Masking was created in collaboration with the Maskito team and enables text formatting as users type. For instance, adding a US phone number would automatically add the hyphens and parentheses – talk about a time saver!
The release of Ionic 7 saw many new features, such as HTML Labels for Select. We added a label slot that lets you pass in any HTML you want for the label, which is great for adjusting colors/decorations on a label. Similar to Select, we also added a label slot for Input and Textarea.
The team also added lots of new CSS shadow parts and CSS variables for datetime styling, giving devs more control over how datetime looks in their project. We added APIs to customize the look of the wheel picker, the time button, and the month/year toggle button.
There are tons more improvements recently made to Framework, including custom icons for select, select styling, segment type improvements, and Angular NavController improvements. And, as always, a huge thank you to the community that continues to contribute to improving Framework! At 28:46, catch Liam’s controversial BBQ opinions.
Stencil v4!
The Stencil team has been hard at work, and at 29:40, ever-stylish Engineering Manager Sean joins Mike to talk about Stencil v4 which was released earlier this year.
Within v4, we’ve enabled a flag that allows for Typescript path configurations to be used in your Stencil project. We’ve also added TypeScript 5 support (in v3.3.0 and later). Stencil also now offers a new feature called primary output target validation, which helps guide developers and warns if you have incorrect configurations in your package.json. You can check out the full list of changes for Stencil v4 in the migration guide.
When asked what’s coming next (34:10), Sean noted that the team is moving into development for scoped slot enhancements, improving the compatibility of using the slots in non-shadow dom elements. We’ve started discovery around adding Element Internals support to Stencil and have an open discussion about Stencil testing infrastructure.
Capacitor rocks (no cap)
For an update on Capacitor, Mike tossed it over to very festive Product Owner Dallas and all-decked-out-for-summer Product Marketing Manager Conner to talk about what’s happening in the great wide world of web native land.
At 39:19, they cover Background Tasks, which is a game-changing new Capacitor feature. While hard to perceive in a short demo, there are tons of scenarios where background tasks are helpful. Whether collecting geolocation points or syncing data (such as uploading photos to a server while the photo app is backgrounded/closed), Background Tasks is sure to be the unsung hero of your next project. You can see it in action in this livestream.
Next, the team talked about what’s in the works over in Capacitor Labs- which is what we refer to as all of our experimental Capacitor projects. In the lab right now we’re working on Capacitor Watch functionality to bring the power of JavaScript to wearable devices. The team is just getting started here, but we’re excited to bring this to everyone as an experimental release.
We also recently debuted the Capacitor Plugin Registry, which makes it easier than ever to find the perfect plugin for your projects. Easily search and filter over 1100 plugins to find exactly what you’re looking for. You can also use our VSCode extension (which recently eclipsed 200k downloads) to access the plugins from the plugin registry directly in your project- see a live demo at 43:04.
Major updates to Appflow
Next up, we passed things off to Cecelia, Ashwini, and Matt from the summer-ready Appflow team, to talk about the latest happenings with Ionic’s Mobile CI/CD solution. After a good-spirited discussion about their favorite summer foods, the team introduced a brand new Appflow feature that makes testing your mobile applications a breeze. Powered by Appetize.io, Appflow now supports in-browser testing for iOS simulator and Android debug builds.
Additionally, the team has been hard at work on all things build stacks. In order to support Capacitor 5, we created a new Linux build stack that includes Gradle 8 and Java JDK 17. Additionally, new Mac and Linux versions support Ionic CLI 7, Cordova CLI 12, and the latest versions of Xcode and cocoapods. Learn more at 52:55.
The team also debuted the biggest updates to live updates in recent memory. We’ve rebuilt the core functionality of live updates from the ground up in native ios and android libraries. In our initial testing, we’ve seen massive improvements in reducing the time it takes to download and apply a new live update, and you can learn more at 53:40. As part of this effort, a new Capacitor-based plugin will be available soon.
AI has been making a huge splash lately, and Appflow is riding those AI waves to make debugging build errors easier than ever. The team put openAI to work and we are happy to introduce “Appflow Assist”. See a demo of this new functionality at 56:45.
We take your data privacy very seriously, so we’re excited to announce that Ionic the company and Appflow the mobile CI/CD platform are both now SOC2 Type 2 certified! The process takes many months to complete, but a huge shout out to the Appflow team because we set a record with our vendor for the fastest time to earn Type 2 certification (not to brag). Learn more about what this cert means and why every cloud vendor you work with should have it.
What can Portals do for you?
The Appflow team then kicked it over to Portals experts Christine and Josh to talk about what’s going on in the wonderful world of micro frontends. The team did a quick retro of the Micro Frontends Summit, which we hosted back in February. It was chock-full of engaging talks from some of the leading minds in micro frontends – you can check out a recap here.
Around 1:01:39, the team delved into superapps – What are they? What are they not? Who are they for? They explained the differences between superapps and micro frontends, and highlighted business cases for both. At 1:04:50, Josh walks us through a live demo of Ionic’s Superapp SDK, Portals, which can help large enterprises build more seamless, user-friendly digital experiences.
Curious about how Portals can change the way your team builds apps? Head over to ionic.io/portals to set up a demo with one of our Portals product specialists.
See you soon!
To close things out, Mike reiterated how much he wants to hang out with each and every one of you at ioniconf, which is happening live in Austin, TX this October. You can learn more and grab tickets on the event website.
The team is also heading to THAT Conference in Wisconsin later this month. If you’re going, come see one of our three (!) talks and grab some cheese curds with the team after.
The Summer 2023 Ionic Show concluded with live Q&A at 1:07:34, where our product teams fielded
questions from the community. Thanks for another great Ionic Show,
and we’ll catch you at the next one!
The post Q3 Ionic Show Recap appeared first on Ionic Blog.
Read more https://ionic.io/blog/q3-ionic-show-recap-2
- Details
- Category: Developer News
This is a guest post from Simon Grimm, Ionic Developer Expert and educator at the Ionic Academy, an online school with 70+ video courses focused entirely on building awesome mobile apps with Ionic and Capacitor!
When building apps with Capacitor, you usually don’t worry a lot about routing as frameworks like Angular, React or Vue have their own routing solutions.But what if you simply want to build a great Capacitor app with VanillaJS?
In that case you have to roll your own routing logic, but spoiler: It’s actually not that hard!
In this tutorial, I’ll show you how to implement your own router for Capacitor apps with VanillaJS, and you can also find the full Capacitor VanillaJS routing code on Github.
Creating a Capacitor App
Since we are not using any framework in this tutorial, we can directly scaffold a basic Capacitor app through the command line:
npm init @capacitor/appAnswer the questions to give your app a name, then install all dependencies and immediately run your app on the browser:
npm install
npm run start
This should start a Vite development server and your app is served at https://localhost:3000/ with some basic elements.

Although we want the least amount of packages, TailwindCSS is one of the essential packages nowadays when it comes to styling and utility libraries, so let’s add this to our app.
However, note that this is not required to build our routing – it just makes our Capacitor app look awesome.
Adding TailwindCSS
You can style your web app with just CSS, but throwing in TailwindCSS makes it easy to have a great-looking app in minutes, still without committing to any JS framework.
To do so, simply install it as described:
npm install -D tailwindcss postcss autoprefixer
npx tailwindcss init
Now we just need to make sure we are including our files in the
tailwind.config.js:
/** @type {import('tailwindcss').Config} */
module.exports = {
  content: ["./src/**/*.{html,js}"],
  theme: {
    extend: {},
  },
  plugins: [],
};
Additionally, we need to use PostCSS and have to create a new postcss.config.js at the root of our project with the following content:
module.exports = {
  plugins: {
    tailwindcss: {},
    autoprefixer: {},
  },
};
As a last step we need to load the Tailwind classes, so let’s
add the following to our src/css/style.css:
/* Add Tailwind imports */
@tailwind base;
@tailwind components;
@tailwind utilities;
You can confirm that everything works correctly by adding some Tailwind utility classes to an element in your:
<h1 class="m-4 font-bold text-4xl underline">TEST</h1>This should result in a styled header element, and you should restart your live reload after all previous steps have been completed.

Now we are ready to use Capacitor with VanillaJS to create powerful native mobile apps with Tailwind styling!
Building a Capacitor App with Routing
By default, the Capacitor app has one Javascript file that defines a custom element with some styling and functionality.
As we want to build our own functionality from the ground up,
let’s delete the src/js/capacitor-welcome.js and also
all references to it inside the src/index.html.
Now let’s approach our Vanilla routing!
Routing in VanillaJS Apps
When it comes to routing in VanillaJS apps, there are many different approaches and libraries out there.
The most basic way is to use the History API to change the URL and listen to changes, but this is not very convenient.
Instead we will use a super slim package called Navigo that will give us some additional methods and ways to listen to changes.
If you are adventurous, feel free to try and build your own SPA router!
To get started, let’s install Navigo:
npm install navigoNow we can define our different routes and also the corresponding components that should be rendered with Navigo.
Creating a Simple Tab Bar
To use Navigo we need to set up a router instance and define our routes, and then use data-navigo attributes on our links to make them work.
Let’s start by creating a new src/js/router.js file
and add the following code:
import Navigo from "navigo";
const router = new Navigo("/");
const render = (content) => (document.querySelector("#content").innerHTML = content);
router
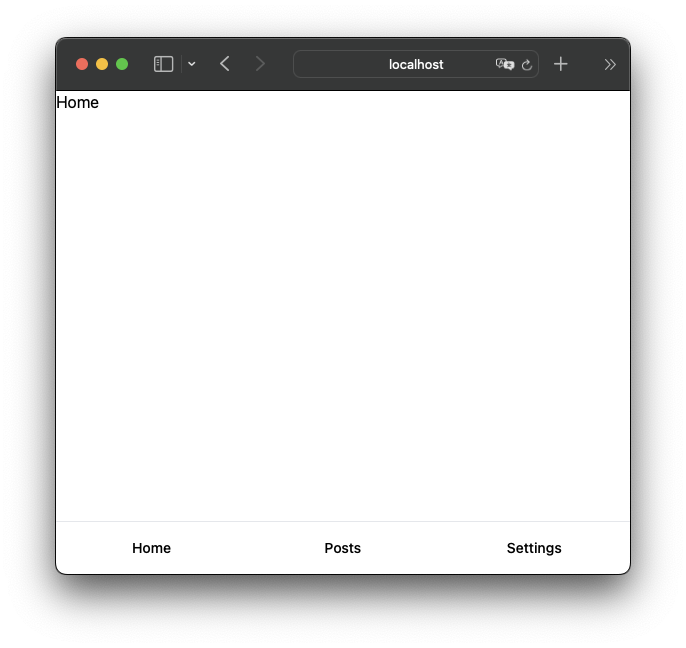
.on("/", (match) => {
render(`<div class="page"><h1>Home</h1></div>`);
})
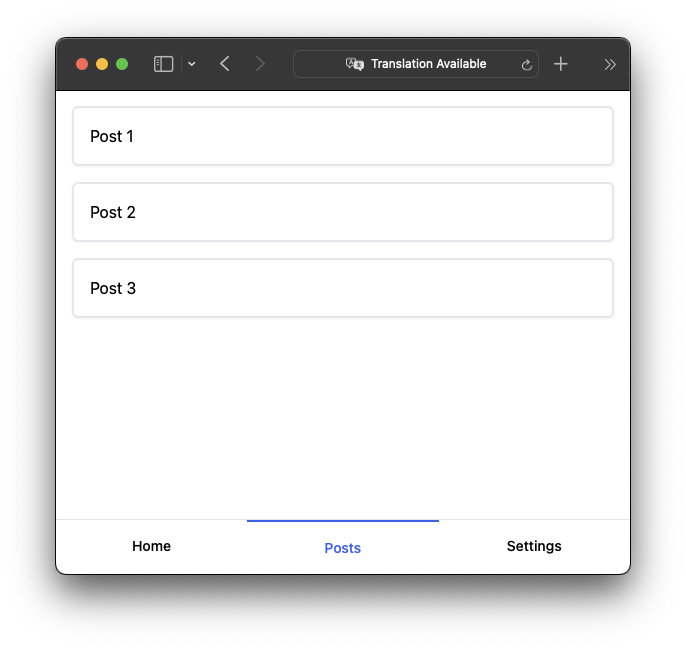
.on("/posts", (match) => {
render(`<div class="page"><div class="posts">
<a href="/posts/1" data-navigo>Post 1</a>
<a href="/posts/2" data-navigo>Post 2</a>
<a href="/posts/3" data-navigo>Post 3</a>
</div>
</div>`);
})
.on("/settings", (match) => {
render(`<div class="page"><h1>Settings</h1></div>`);
})
.resolve();This code will create a new Navigo router instance, and then define three routes for the home page, the posts page, and the settings page.
Additionally, we are using a render function that will simply set the inner HTML of our #content element to the content we pass in.
Finally, we are calling the resolve method to make sure that the current route is resolved and the correct content is rendered.This means that our actual content lives in one div and is simply swapped out when the URL changes. This basic approach works well for our use case.
You could make this more advanced by adding a templating engine like Handlebars or EJS to render the content from files, which is certainly required for more complex projects.
Now we can add the following code to our src/index.html to define some tabs and make them work with Navigo:
<body>
    <div class="flex flex-col min-h-screen">
      <div class="app-navbar-notch"></div>

      <div id="content" class="flex-1"></div>

      <div class="tab-bar">
        <nav class="flex" aria-label="Tabs">
          <a href="/" data-navigo class="tab">Home</a>
          <a href="/posts" data-navigo class="tab">Posts</a>
          <a href="/settings" data-navigo class="tab">Settings</a>
        </nav>
      </div>
    </div>

    <script src="/./js/router.js" type="module"></script>
  </body>
At this point it won’t really look like tabs, so let’s sprinkle
in some Tailwind styling through our
src/css/style.css:
:root {
  --nav-bg: theme(colors.blue.600);
}

.tab-bar {
  @apply border-t border-gray-200 w-full fixed bottom-0;
}

.tab {
  @apply flex-1 flex justify-center whitespace-nowrap py-4 px-1 text-sm font-medium;
  margin-bottom: env(safe-area-inset-bottom);
}
This will give us a nice tab bar at the bottom of our app, and we can now navigate between the different pages.
But this is far from a real tab bar, so let’s add some additional functionality to make it more dynamic.
Tab Changes and Dynamic URLs
It’s not enough to render the content of a selected tab, we also want to show which tab is active. Additionally, let’s also add one more route to Navigo to show a single post based on an ID in the URL.
Therefore we can update our src/js/router.js to the
following:
import Navigo from "navigo";

const router = new Navigo("/");
const body = document.querySelector("body");

const render = (content) => (document.querySelector("#content").innerHTML = content);

router
  .on("/", (match) => {
    body.dispatchEvent(new CustomEvent("page-changed", { detail: { page: "Home", tab: 0 } }));
    updateTabbar(0);
    render(`<div class="page"><h1>Home</h1></div>`);
  })
  .on("/posts", (match) => {
    body.dispatchEvent(new CustomEvent("page-changed", { detail: { page: "Posts", tab: 1 } }));
    updateTabbar(1);
    render(`<div class="page"><div class="posts">
    <a href="/posts/1" data-navigo>Post 1</a>
    <a href="/posts/2" data-navigo>Post 2</a>
    <a href="/posts/3" data-navigo>Post 3</a>
    </div>
  </div>`);
  })
  .on("/settings", (match) => {
    body.dispatchEvent(new CustomEvent("page-changed", { detail: { page: "Settings", tab: 2 } }));
    updateTabbar(2);
    render(`<div class="page"><h1>Settings</h1></div>`);
  })
  .on("/posts/:id", (match) => {
    console.log(match);
    const id = match.data.id;
    body.dispatchEvent(new CustomEvent("page-changed", { detail: { page: `Post ${id}`, tab: 1, back: true } }));
    updateTabbar(1);
    render(`<div class="page"><h1>POST DETAILS: ${id}</h1></div>`);
  })
  .resolve();

function updateTabbar(activeIndex) {
  const tabs = document.getElementsByClassName("tab");

  for (let i = 0; i < tabs.length; i++) {
    if (i === activeIndex) {
      tabs[i].classList.add("tab-active");
    } else {
      tabs[i].classList.remove("tab-active");
    }
  }
}
We basically enriched our routes with some additional functionality:
- We are now dispatching a page-changed event on the body element whenever a route is resolved. This event contains the name of the page and the index of the tab that should be active – we will use this soon to include a fancy additional navigation bar at the top of our app.
- We are also calling a new updateTabbar function that will update the tab bar CSS class based on the active index.
- We are also adding a new route for /posts/:id that will show a single post based on the ID in the URL. This route will also dispatch the page-changed event, but with a back property set to true. This will be used to show a back button in the tab bar.
Now that we are adding additional classes to the tabs, let’s
define the styling for those in our
src/css/style.css:
.tab-active {
  @apply border-t-2 border-blue-600 text-blue-600 flex-1 flex justify-center whitespace-nowrap py-4 px-1 text-sm font-medium;
}

.page {
  height: calc(100vh - 54px - 53px - env(safe-area-inset-top) - env(safe-area-inset-bottom));
  margin-top: env(safe-area-inset-top);
}

.posts {
  @apply p-4 flex flex-col gap-4;
}

.posts a {
  @apply border-gray-200 border-2 rounded-md p-4 flex flex-col gap-4 shadow-sm;
}
This will make the active tab look a bit different from the others, and we can already navigate to a details page and see the ID reflected in the component:
But real apps also have a navigation bar, and we can recreate this feature with VanillaJS as well.
Adding a Navigation Bar
The navigation bar is a common pattern in mobile apps, and it’s a great way to show the current page and provide a back button to the previous page in case we navigated from a list to a details page. The navigation bar should be at the top and show the title of the current active page, and needs to have an optional back button. As we already have the page-changed event, we can use this to update the navigation bar whenever the page changes!
We can create this component as a new web component, so let’s
add a new file src/js/navbar.js and insert:
window.customElements.define(
  "custom-navbar",
  class extends HTMLElement {
    constructor() {
      super();
      const root = this.attachShadow({ mode: "open" });
      root.innerHTML = `
    <style>
      :host {
        position: relative;
        display: block;
        padding: 15px 15px 15px 15px;
        text-align: center;
        background-color: var(--nav-bg);
        position: fixed;
        width: 100%;
        top: env(safe-area-inset-top);
      }
      .nav {
        display: flex;
        flex-direction: row;
        gap: 10px;
      }
      h1 {
        margin: 0;
        font-size: 1em;
        font-weight: 700;
        color: #fff;
      }
      #back-btn {
        width: 24px;
        height: 24px;
        display: none;
        color: #fff;
        font-size: 1em;
        font-weight: 700;
        text-decoration: none;
      }
    </style>
    <div class="nav">
      <a id="back-btn">
      <svg xmlns="https://www.w3.org/2000/svg" class="ionicon" viewBox="0 0 512 512"><path fill="none" stroke="currentColor" stroke-linecap="round" stroke-linejoin="round" stroke-width="48" d="M328 112L184 256l144 144"/></svg>
      </a>
      <div><h1 id="nav-title"></h2></div>
    </div>
    `;
    }

    // Called on start
    connectedCallback() {
      const self = this;

      // Listen to our page change events
      const body = document.querySelector("body");
      const navTitle = self.shadowRoot.getElementById("nav-title");

      body.addEventListener("page-changed", (event) => {
        const title = event.detail.page;
        navTitle.innerHTML = title;

        const canGoBack = event.detail.back;
        if (canGoBack) {
          self.shadowRoot.getElementById("back-btn").style.display = "block";
        } else {
          self.shadowRoot.getElementById("back-btn").style.display = "none";
        }
      });

      const backBtn = self.shadowRoot.getElementById("back-btn");
      backBtn.addEventListener("click", (event) => {
        history.back();
      });
    }
  }
);
If you are not familiar with web components, this might look a bit strange, butit’s quite simple:
- We are defining a new web component called custom-navbar that
extends the
HTMLElementclass. - We are using the
connectedCallbackmethod to listen to thepage-changedevent on the body element. Whenever this event is fired, we are updating the title of the navigation bar and showing or hiding the back button based on the back property of the event. - We are also listening to the click event on the back button and
calling
history.back()to go back to the previous page. - We are using a
shadowRootto encapsulate the styling of the component.
You can also learn more about building Capacitor apps with VanillaJS in one of my previous tutorials.
Now that we have our component, let’s add it to our
src/index.html and include a little fix from the
previous tutorial to make the tab bar appear below the notch
area:
<body>
    <div class="flex flex-col min-h-screen">
      <div class="app-navbar-notch"></div>
      <div style="height: 54px">
        <custom-navbar></custom-navbar>
      </div>

      <div id="content" class="flex-1"></div>

      <div class="tab-bar">
        <nav class="flex" aria-label="Tabs">
          <a href="/" data-navigo class="tab">Home</a>
          <a href="/posts" data-navigo class="tab">Posts</a>
          <a href="/settings" data-navigo class="tab">Settings</a>
        </nav>
      </div>
    </div>

    <script src="/./js/navbar.js" type="module"></script>
    <script src="/./js/router.js" type="module"></script>
  </body>
The code for the notch area fix needs to be added to our
src/css/app.css:
/* Fix for iOS area above our custom nav bar */
.app-navbar-notch {
  position: fixed;
  top: 0;
  left: 0;
  right: 0;
  z-index: 99;
  height: env(safe-area-inset-top);
  @apply bg-blue-600;
}
With all of that in place, navigate around the tabs and see how the title changes – and also check out this beauty of a details page with custom navigation bar:

If you think this is a powerful native app, hold your praise – there’s one more thing we want to add!
Capacitor Deeplinks
As we have a list of posts and detailed pages, wouldn’t it be nice if we could directly open a page of our app from a link?
This is possible with deeplinks – and Capacitor has a plugin for that! Let’s install the plugin:
npm install @capacitor/appNow all we have to do in our code is to listen to the
appUrlOpen event and navigate to the page that was
opened.
We can split the URL by a specific URL scheme, which we later also need to set up for iOS and Android (it’s super easy), and then grab the right path to our post.
Go ahead by adding the following to our
src/js/router.js:
import { App } from "@capacitor/app";

App.addListener("appUrlOpen", (event) => {
  const pathArray = event.url.split("capacitorvanilla://");
  if (pathArray.length > 1) {
    const url = pathArray.pop();
    router.navigate(url);
  }
});
To see that code in action we now need to move our Capacitor project to a native platform.
Adding Native Platforms
To get started, install the native platforms and run a build of your web project. Afterward we can add the platforms using the Capacitor CLI in our project:
npm install @capacitor/android @capacitor/ios
npm run build

npx cap add android
npx cap add ios
Now whenever you want to build a native app, you can simply build your web project and sync those changes into the native folders:
npm run build
npx cap sync
Next we need to add our URL scheme to the native platforms, so that they know how to open our app.
We start with iOS, for which we can edit the
ios/App/App/Info.plist and add a new entry like
this:
<key>CFBundleURLTypes</key>
        <array>
                <dict>
                        <key>CFBundleURLName</key>
                        <string>com.galaxies.routing</string>
                        <key>CFBundleURLSchemes</key>
                        <array>
                                <string>capacitorvanilla</string>
                        </array>
                </dict>
        </array>
This tells iOS that our app can be opened with the
capacitorvanilla URL scheme.
For Android, we now need to edit the
android/app/src/main/AndroidManifest.xml and add the
following intent filter to the MainActivity:
<intent-filter>
  <action android:name="android.intent.action.VIEW" />
  <category android:name="android.intent.category.DEFAULT" />
  <category android:name="android.intent.category.BROWSABLE" />
  <data android:scheme="@string/custom_url_scheme" />
</intent-filter>
Additionally, we now need to add the
custom_url_scheme to our
android/app/src/main/res/values/strings.xml:
<string name="custom_url_scheme">capacitorvanilla</string>Now we can build our native apps and run them on a device or emulator:
npx cap run ios
npx cap run android
To check if this works, simply create a note somewhere on your
phone and add the link capacitorvanilla://posts/1337
and open it. You should now see the details page of the post with
the ID 1337!

Capacitor almost makes it too easy to build native apps, right?
Parting Thoughts
In this tutorial we have learned how to add routing to a Capacitor app with just VanillaJS and Navigo.
We also learned how to add deeplinks to our app, so that we can open specific pages from a link.
Finally, we made everything look nice with a custom navigation bar and Tailwind styling.
If you enjoyed this tutorial, check out how you can use Capacitor to build native iOS and Android apps with the web.
The post Build your own App Router in Capacitor Apps with VanillaJS appeared first on Ionic Blog.
Read more https://ionic.io/blog/build-your-own-app-router-in-capacitor-apps-with-vanillajs
- Details
- Category: Developer News
Cloud security incidents are more common than you think – and the consequences can be catastrophic and costly. The 2023 Cloud Security Report showed that 24% of organizations experienced a public cloud-related security incident in the past 12 months. That’s a 1 in 4 chance your organization could be at risk for exposing sensitive user data. To mitigate that risk, choosing the right tech stack is a critical choice you must consider.
Your users trust you to build a secure app, and part of avoiding security incidents is choosing secure tools. Choosing cloud providers for your development tools is a big responsibility, and determining whether you can trust a cloud provider should be based on a variety of factors.
One factor that should be considered mandatory is SOC 2 certification. Every cloud provider you evaluate for your organization should be SOC 2 certified to demonstrate their commitment and compliance with the highest security standards.
What does it mean to be SOC 2 certified?
SOC 2 certification means that an organization is in compliance with standards set by the American Institute of Certified Public Accountants (AICPA) to test controls for information security and privacy. It requires completing a two-step exam that evaluates and audits five categories of trust services criteria, including: Security, Availability, Confidentiality, Privacy, and Processing.
Achieving SOC 2 certification is the industry standard for products that use cloud storage for data and is considered table stakes for many enterprises evaluating cloud service providers and vendors.
The certification process takes on average 6-12 months, and requires ongoing review to maintain compliance. Companies that invest in SOC 2 certification are demonstrating a serious commitment to security and compliance for their users.
You can read more about the specifics of a SOC 2 exam process here.
The importance of SOC 2 certification
You likely use a number of different cloud providers throughout the development lifecycle of your app. Everything from your Git provider, to authentication tooling, to deployment and hosting. The more complex your app and your organization, the more likely you are to use a number of cloud-based tools.
Each cloud provider you use increases the potential risk for a security incident, because you are reliant on third parties. That does not mean cloud providers are not secure – in fact, because of the nature of these risks, cloud providers typically have a heavy focus on security. However, it is important that you evaluate the security of the tools you use based on a number of factors.
Certifications provide the quickest path to evaluate provider security. This is because by passing a certification process like the SOC 2, providers have already demonstrated to an impartial auditing firm that they are following a rigorous list of standards and best practices.
This means that you not only can be confident in selecting a cloud provider with SOC 2 certification because of their security practices, but you also reduce the overhead and effort needed to evaluate. This is why many organizations consider SOC 2 certification as the gold standard for their cloud-based tools.
Evaluating cloud provider security
Some other factors you may want to consider include:
- Encryption: When and how is encryption used across the system?
- Access control: Who in the organization has access to your data?
- Isolation: How are environments specific to your organization handled and secured?
- SLAs: What are the service level agreements for uptime, and what is the response plan when an incident occurs?
A self-hosted or “bring-your-own-cloud” strategy may make sense for certain vendors as well. You can read more about this approach here.
Evaluating the security of your tools also extends beyond cloud providers and includes SDKs or plugins leveraged by your development team. For building mobile apps, you’ll want to consider factors such as:
- Identifying security holes in your app
- Using the right tools for app data security
- Preventing man-in-the-middle attacks with SSL pinning
SOC 2 Certification at Appflow
Appflow, Ionic’s mobile CI/CD platform, has a longstanding commitment to security as a cloud provider. In December 2022, we announced compliance with SOC 2 Type I, and are excited to confirm that we have now successfully completed the exam for SOC 2 Type II compliance!
By achieving SOC 2 Type II certification, Appflow has shown compliance with security standards for an ongoing period of at least six months and will continue to submit for ongoing review of our practices.
Rest assured that Appflow is following the strictest procedures and protocols to keep your data safe. This means you can feel confident using Appflow for projects that are mission critical for your business and users.
To learn more about Appflow’s ongoing commitment to security, visit our Trust page here, or contact a member of our team to learn more about our SOC 2 report.
The post Why every cloud provider should be SOC 2 certified appeared first on Ionic Blog.
Read more https://ionic.io/blog/why-every-cloud-provider-should-be-soc-2-certified